
网络爬虫
大约 11 分钟
快速上手
from urllib import request
import re

url = "http://www.baidu.com"
result = request.urlopen(url)
# 打印状态码
print(result.code)

# 快速爬取网页的三种方法
# 爬到内存中(方法1)
data1 = result.read().decode("utf-8", "ignore")
print(data1)

# 爬到内存中(方法2)
data2 = request.urlopen(request.Request(url)).read().decode("utf-8", "ignore")
print(data2)

# 保存到硬盘
request.urlretrieve(url, filename="C:/baidu.html")

# 循环爬取慕课网页面数据
for i in range(100, 200):
    url = "https://coding.imooc.com/class/" + str(i) + ".html"
    data = request.urlopen(url).read().decode("utf-8", "ignore")
    title = '<h1>(.*?)</h1>'
    price = '<div class="cur-price">¥(.*?)</div>'
    title_result = re.compile(title, re.S).findall(data)
    price_result = re.compile(price, re.S).findall(data)
    if len(title_result) > 0:
        print(title_result[0])
    else:
        continue
    if len(price_result) > 0:
        print(price_result[0])
    else:
        print("免费")
    print("------------------------")
urllib模块
urllib模块是Python使用得最多的网络请求工具之一。
搜索关键词
因为现在度娘增加了安全验证,所以下面的代码爬不出任何东西,我也懒得去整活,只不过方法还是可以参考借鉴的。
后面可以用Google来代替它。
# 自动搜索某个关键词并自动翻页
# 关键词:python爬虫
# 初始搜索参数
baiduurl = "http://www.baidu.com/s?ie=utf-8&f=8&rsv_bp=1&tn=baidu&wd=python%E7%88%AC%E8%99%AB&oq=python%25E7%2588%25AC%25E8%2599%25AB&rsv_pq=a3c1791b004fa253&rsv_t=88b3TunpVfdXbxyMRDLM19Qb%2F%2FHLq0TlVLpcW8UK8%2BiFX2JrXYoNyhZJe2Y&rqlang=cn&rsv_enter=1&rsv_dl=tb&rsv_sug3=1&rsv_sug1=1&rsv_sug7=100&rsv_sug2=0&rsv_btype=t&inputT=3&rsv_sug4=251"
# 观察参数的变化,发现真正起作用的只有“wd”、“pn”这两个参数,一个是关键字,一个是翻页
# 第一页
baiduurl1 = "https://www.baidu.com/s?wd=python%E7%88%AC%E8%99%AB"
# 第二页
baiduurl2 = "https://www.baidu.com/s?wd=python%E7%88%AC%E8%99%AB&pn=10"
# 第三页
baiduurl3 = "https://www.baidu.com/s?wd=python%E7%88%AC%E8%99%AB&pn=20"
# 重新构造参数,爬取前10页内容
key = request.quote("python爬虫")
baidu = "http://www.baidu.com/s?wd=" + key
for i in range(0, 10):
    searchurl = baidu + "&pn=" + str(i * 10)
    print("正在爬取第" + str(i + 1) + "页数据")
    # 根据正则表达式将爬到的网页列表中各网页标题进行提取
    data = request.urlopen(searchurl).read().decode("utf-8", "ignore")
    pat = '"title":"(.*?)"'
    result = re.compile(pat, re.S).findall(data)
    # 将各标题信息通过循环遍历输出
    for j in range(0, len(result)):
        print("第" + str(j) + "条网页标题是:" + str(result[j]))
    print("------------------------")
POST请求
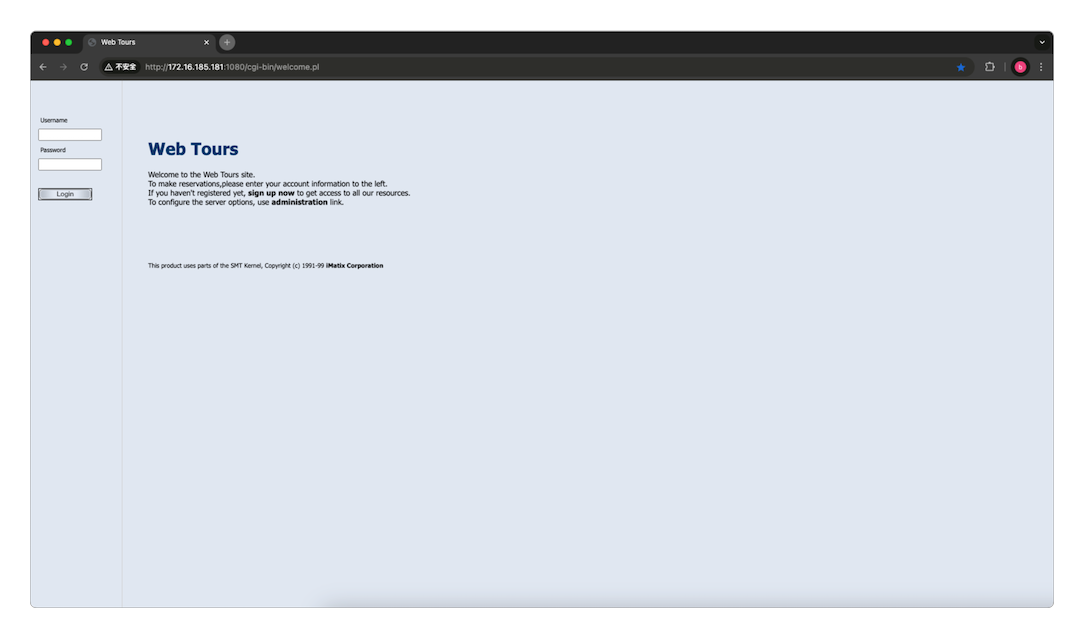
通过本地部署的Web Tours Application网站实现对POST请求的测试。
from urllib import request
from urllib import parse

url = "http://172.16.185.181:1080/cgi-bin/welcome.pl"
data = parse.urlencode({
    "username": "test1",
    "password": "123456",
}).encode('utf-8')
req = request.Request(url, data)
result = request.urlopen(req).read()
file = open("~/post.html", "wb")
file.write(result)
file.close()虽然成功执行并保存了文件,但因为没有Cookie,所以页面显示得并不完全。
Cookie处理
现在给它增加Cookie处理的功能代码。
from urllib import request
from urllib import parse
import http.cookiejar

# Cookie处理
cjar = http.cookiejar.CookieJar()
opener = request.build_opener(request.HTTPCookieProcessor(cjar))
# 将Cookie安装为全局对象
request.install_opener(opener)

url = "http://172.16.185.181:1080/cgi-bin/welcome.pl"
data = parse.urlencode({
    "username": "test1",
    "password": "123456",
}).encode('utf-8')

req = request.Request(url, data)
result = request.urlopen(req).read()
file = open("~/post.html", "wb")
file.write(result)
file.close()

# 读取Cookie内容
print(str(cjar))
浏览器伪装
可以通过给浏览器添加HTTP Header头,将网络爬虫伪装成浏览器。
from urllib import request

url = "https://www.qiushibaike.com/"

# 头文件格式header=("User-Agent", 具体用户代理值)
# 通过Opener添加Header
header = ("User-Agent", "Mozilla/5.0 (Macintosh; Intel Mac OS X 10_15_7) AppleWebKit/537.36 (KHTML, like Gecko) Chrome/131.0.0.0 Safari/537.36")
opener = request.build_opener()
opener.addheaders = [header]
data1 = opener.open(url).read().decode("utf-8", "ignore")
# 全局生效
request.install_opener(opener)
result = request.urlopen(url).read().decode("utf-8", "ignore")

# 以字典的方式添加多个头信息
header = {
    "User-Agent": "Mozilla/5.0 (Macintosh; Intel Mac OS X 10_15_7) AppleWebKit/537.36 (KHTML, like Gecko) Chrome/131.0.0.0 Safari/537.36",
    "Content-Type": "application/javascript",
}
opener = request.build_opener()
head_all = []
for key, value in header.items():
    item = (key, value)
    head_all.append(item)
opener.addheaders = head_all
request.install_opener(opener)
data2 = request.urlopen(url).read().decode("utf-8", "ignore")

# 通过request添加Header
req = request.Request(url)
req.add_header('User-Agent', 'Mozilla/5.0 (Macintosh; Intel Mac OS X 10_15_7) AppleWebKit/537.36 (KHTML, like Gecko) Chrome/131.0.0.0 Safari/537.36')
data3 = request.urlopen(req).read().decode("utf-8", "ignore")
写入数据库
需要先通过Pip安装pymysql驱动,然后在相应环境的~/site-packages/pymysql/connections.py中查找charset="",并将它修改为charset="utf8mb4"。
from urllib import request
import re
import pymysql

conn = pymysql.connect(host="127.0.0.1", user="root", passwd="123456", db="test")
for i in range(0, 1000):
    url = "https://coding.imooc.com/class/" + str(i) + ".html"
    data = request.urlopen(url).read().decode("utf-8", "ignore")
    title = '<h1>(.*?)</h1>'
    price = '<div class="cur-price">¥(.*?)</div>'
    title_result = re.compile(title, re.S).findall(data)
    price_result = re.compile(price, re.S).findall(data)
    if len(title_result) > 0:
        print(title_result[0])
    else:
        continue
    if len(price_result) > 0:
        print(price_result[0])
    else:
        print("免费")
    # 插入数据
    conn.query('INSERT INTO imooc(title, price) VALUES(\'{0}\', \'{1}\')'.format(str(title_result[0]), str(price_result[0])))
    conn.commit()
    print("------------------------")
requests模块
requests模块和urllib模块一样,都是Python的网络请求工具。
先通过命令行安装。
> pip install requests然后再使用requests爬取网页。
import requests
import re

rsp1 = requests.get("https://www.imooc.com/")
# 设置Cookie
ck = requests.utils.dict_from_cookiejar(rsp1.cookies)
title = re.compile("<title>(.*?)</title>", re.S).findall(rsp1.text)
print(title)

# 设置浏览器头
header = {
    "User-Agent": "Mozilla/5.0 (Macintosh; Intel Mac OS X 10_15_7) AppleWebKit/537.36 (KHTML, like Gecko) Chrome/131.0.0.0 Safari/537.36"
}
# # 设置代理
# proxy = {
#     "http": "http://127.0.0.1:8888",
#     "https": "http://127.0.0.1:8888",
# }
rsp2 = requests.get("https://www.imooc.com/", headers=header, cookies=ck)
title = re.compile("<title>(.*?)</title>", re.S).findall(rsp2.text)
print(title)

key = {
    "q": "python",
}
rsp3 = requests.get("https://www.google.com.hk/search", headers=header, cookies=ck, params=key)
title = re.compile("<title>(.*?)</title>", re.S).findall(rsp3.text)
print(title)

data = {
    "username": "test1",
    "password": "123456",
}
rsp4 = requests.post("http://172.16.185.181:1080/cgi-bin/welcome.pl", data=data)
title = re.compile("<title>(.*?)</title>", re.S).findall(rsp4.text)
print(title)
beautifulsoup模块
beautifulsoup与正则表达式类似,但它更多是通过各种HTML标签来实现信息的筛选与提取。
先通过命令行安装。
> pip install bs4再使用它来处理提取到的数据。
from bs4 import BeautifulSoup as bs
from urllib import request

data = request.urlopen("https://www.imooc.com/").read().decode("utf-8", "ignore")
bs1 = bs(data)
# 格式化输出
print(bs1.prettify())

# 获取标签:bs对象.标签名
bs1.title
# 获取标签里面的文字:bs对象.标签名.string
bs1.title.string
# 获取标签名:bs对象.标签名.name
bs1.title.name
# 获取属性列表:bs对象.标签名.attrs
bs1.a.attrs
# 获取某个属性对应的值:bs对象.标签名[属性名] 或者 bs对象.标签名.get(属性名)
bs1.a["class"]
bs1.a.get("class")
# 提取所有某个节点的内容:bs对象.find_all('标签名')
bs1.find_all('a')
# 提取多个标签的内容:bs对象.find_all(['标签名1','标签名2,…,标签n'])
bs1.find_all(['a', 'ul'])
# 提取所有子节点:bs对象.标签.contents
k1 = bs1.ul.contents
# 提取所有子节点的迭代器:bs对象.标签.children
k2 = bs1.ul.children
allulc = [i for i in k2]
更多操作可以看它的官方文档。
代码实例
爬取Google
from urllib import request
import re
import http.cookiejar

# 伪装成浏览器并设置cookie
header = ("User-Agent", "Mozilla/5.0 (Macintosh; Intel Mac OS X 10_15_7) AppleWebKit/537.36 (KHTML, like Gecko) Chrome/131.0.0.0 Safari/537.36")
cjar = http.cookiejar.CookieJar()
opener = request.build_opener(request.HTTPCookieProcessor(cjar))
opener.addheaders = [header]
# 全局生效
request.install_opener(opener)

# 搜索某个关键词并自动翻页
# 关键词:python爬虫
# 初始搜索参数
google_url = "https://www.google.com.hk/search?q=python&newwindow=1&sca_esv=0c814c2424608e41&source=hp&ei=wqJBZ8nOG8yBvr0P5PKY8AM&iflsig=AL9hbdgAAAAAZ0Gw0i-0e2grD7EgEGMlpmnYeMTARPx2&ved=0ahUKEwjJt46ulPKJAxXMgK8BHWQ5Bj4Q4dUDCA0&uact=5&oq=python&gs_lp=Egdnd3Mtd2l6IgZweXRob24yChAAGIAEGEMYigUyChAAGIAEGEMYigUyChAAGIAEGEMYigUyChAAGIAEGEMYigUyChAAGIAEGEMYigUyChAAGIAEGEMYigUyChAAGIAEGEMYigUyChAAGIAEGEMYigUyChAAGIAEGEMYigUyChAAGIAEGEMYigVI5AhQAFj0BnAAeACQAQCYAWqgAYMEqgEDNS4xuAEDyAEA-AEBmAIGoAKaBMICBRAAGIAEmAMAkgcDNC4yoAeSEQ&sclient=gws-wiz"
# 观察参数的变化,发现真正起作用的只有“search”、“start”这两个参数,一个是关键字,一个是翻页
# 第一页
google_url1 = "https://www.google.com.hk/search?q=python%E7%88%AC%E8%99%AB"
# 第二页
google_url2 = "https://www.google.com.hk/search?q=python%E7%88%AC%E8%99%AB&start=10"
# 第三页
google_url3 = "https://www.google.com.hk/search?q=python%E7%88%AC%E8%99%AB&start=20"
# 重新构造参数,爬取前10页内容
# 对中文进行编码,不然会报错
key = request.quote("python爬虫")
google = "https://www.google.com.hk/search?q=" + key
for i in range(0, 10):
    searchurl = google + "&start=" + str(i * 10)
    print("正在爬取第" + str(i + 1) + "页数据")
    # 根据正则表达式将爬到的网页列表中各网页标题进行提取
    data = request.urlopen(searchurl).read().decode("utf-8", "ignore")
    pat = '<h3 class="LC20lb MBeuO DKV0Md">(.*?)</h3>'
    result = re.compile(pat, re.S).findall(data)
    # 将各标题信息通过循环遍历输出
    for j in range(0, len(result)):
        print("第" + str(j) + "条网页标题是:" + str(result[j]))
        print("\n")
    print("------------------------")
爬取17173
from urllib import request
import ssl
import re

# 消除https证书错误
ssl._create_default_https_context = ssl._create_unverified_context

class Spider():
    '''
        网址:https://v.17173.com/so-index.html?code=SYPC
        需要爬取的是这部分内容,需求:统计浏览量排名,并以倒序输出
        <li class="item">
            <a href="//v.17173.com/v_1_1/NDAwNzExNjk.html">
                <p class="pic-box">
                    <img src="//i.17173cdn.com/gdthue/YWxqaGBf/8tha/UnhuzvbsdppxpuD.jpg" alt="">
                    <span class="duration">00:32</span>
                    <span class="view">2,129</span>
                </p>
                <p class="txt-box"> 《魔域》跨服家族战8强出炉!凯诺克斯“赤龙”战椅助力巅峰之战</p>
            </a>
        </li>
    '''
    url = 'https://v.17173.com/so-index.html?code=SYPC'
    root_pattern = '<li class="item">([\s\S]*?)</li>'
    view_pattern = '<span class="view">([\s\S]*?)</span>'
    text_pattern = '<p class="txt-box">([\s\S]*?)</p>'

    def __fetch_content(self):
        htmls = request.urlopen(self.url).read()
        return str(htmls, encoding='utf-8')

    def __analysis(self, htmls):
        root_html = re.findall(self.root_pattern, htmls)
        results = []
        # 再次解析内容
        for html in root_html:
            view = re.findall(self.view_pattern, html)
            text = re.findall(self.text_pattern, html)
            result = {
                # 将字符串转换为数字
                'view': int(str(view[0]).strip().replace(',', '')),
                'text': str(text[0]).strip()
            }
            results.append(result)
        return results

    def go(self):
        htmls = self.__fetch_content()
        results = self.__analysis(htmls)
        # 对字典列表进行排序
        results = sorted(results, key=lambda x: x['view'])
        return results

spider = Spider()
results = spider.go()
print("页面输出结果:")
for result in results:
    print("观看人数:", result['view'], "\t内容标题:", result['text'])
输出结果如下。
页面输出结果:
观看人数: 2131 	内容标题: 《魔域》跨服家族战8强出炉!凯诺克斯“赤龙”战椅助力巅峰之战
观看人数: 8595 	内容标题: “1”起冒险再出发!合金周年狂欢418震撼开启
观看人数: 9192 	内容标题: 《火影忍者:忍者新世代》宇智波一族的天才
观看人数: 9384 	内容标题: 玩法升级畅享真实赛场体验,《FC足球世界》玩法制作人Timo带你玩转新版本!
观看人数: 10086 	内容标题: 《光与夜之恋》活动PV:漫漫春居
观看人数: 12335 	内容标题: 《光与夜之恋》活动PV:暖日闲居
观看人数: 12909 	内容标题: 断魂针,绝情剑!《剑侠世界:起源》新门派古墓技能首曝
观看人数: 13883 	内容标题: 《光与夜之恋》陆沉生日活动:如梦长栖
观看人数: 20766 	内容标题: 【张卫健主演】五毒现世!西山居《剑侠世界:起源》江湖系列片
观看人数: 20963 	内容标题: 【张卫健主演】五毒现世!西山居《剑侠世界:起源》江湖系列片
观看人数: 21019 	内容标题: 【张卫健主演】五毒现世!西山居《剑侠世界:起源》江湖系列片
观看人数: 22305 	内容标题: 亿万剑侠的江湖起源!西山居《剑侠世界:起源》年度版今日公测
观看人数: 25158 	内容标题: 国产单机大厂进军二次元!《白荆回廊》凭什么杀出重围?
观看人数: 26039 	内容标题: 张卫健主演!《剑侠世界:起源》年度版武侠片花絮曝光
观看人数: 30356 	内容标题: 古墓登场,剑指铁浮城!《剑侠世界:起源》新资料片震撼公布
观看人数: 30584 	内容标题: 张卫健主演!《剑侠世界:起源》江湖系列大片预告曝光!
观看人数: 34063 	内容标题: 【张卫健主演】五毒现世!西山居《剑侠世界:起源》江湖系列片
观看人数: 36251 	内容标题: 新门派霸刀!《剑侠世界3》绝世霸刀资料片今日上线
观看人数: 38911 	内容标题: 仗剑同行,两载回忆!《剑侠世界3》2周年视频点燃剑侠情
观看人数: 89165 	内容标题: 金银匠心,剑光璀璨! 非遗大师助阵《剑侠世界:起源》武林大会
爬取huya
再爬取另一个网站。
from urllib import request
import ssl
import re
import gzip
from io import BytesIO
import json

# 消除MacBook中的https证书错误
ssl._create_default_https_context = ssl._create_unverified_context

class Spider():
    '''
        目标网址:https://www.huya.com/g/wzry
        爬取的内容解解码后变成了JSON字符串,需要爬取的是 var ALL_LIST_DATA = [...] 中的内容,其中某条数据的格式为:
        {
            "lUid": 1354160941,
            "lYyid": 1496115569,
            "sNick": "哈迪斯第一大司命李白",
            "iSex": 1,
            "iLevel": 40,
            "sAvatar180": "https://huyaimg.msstatic.com/avatar/1025/47/ebd8d06fcad9e3048cfac92e515c48_180_135.jpg?1647435888",
            "lProfileRoom": 12366,
            "sPrivateHost": "haddis",
            "sProfileHomeHost": "haddis",
            "iIsPlatinum": 1,
            "lActivityId": 0,
            "lActivityCount": 9333105,
            "iGid": 2336,
            "iGameId": 0,
            "sGameFullName": "王者荣耀",
            "sGameHostName": "wzry",
            "iBussType": 3,
            "lLiveId": "7403136622269811153",
            "lChannel": 1354160941,
            "lLiveChannel": 1354160941,
            "lUserCount": 2549020,
            "lTotalCount": 2549020,
            "sRoomName": "",
            "sIntroduction": "国一大司命单排100星冲教学~",
            "sPreviewUrl": "",
            "iLiveSourceType": 0,
            "iScreenType": 1,
            "sScreenshot": "http://live-cover.msstatic.com/huyalive/1354160941-1354160941-5816076955115585536-2708445338-10057-A-0-1-imgplus/20240815113234.jpg",
            "iIsSecret": 0,
            "iCameraOpen": 0,
            "iIsBluRay": 1,
            "sBluRayMBitRate": "10M",
            "iBitRate": 10000,
            "lLiveCompatibleFlag": 0,
            "iRecommendStatus": 0,
            "sRecommendTagName": "",
            "iIsRoomPay": 0,
            "sRoomPayTag": "",
            "iIsWatchTogetherVip": 0,
            "iStartTime": 1723677065,
            "iTime": 15743,
            "iUpdateCacheTime": 1723692808,
            "mpCorner": {
                "_kproto": {
                    "_classname": "string"
                },
                "_bKey": 0,
                "_bValue": 0,
                "value": {
                    "ListPos2": {
                        "sContent": "李白",
                        "sIcon": "",
                        "sBackImage": "",
                        "_classname": "LiveList.CornerInfo"
                    }
                },
                "_classname": "map<string,LiveList.CornerInfo>"
            },
            "tImgRecInfo": {
                "sType": "",
                "sValue": "",
                "sTypeDesc": "",
                "_classname": "LiveList.ImgRecInfo"
            },
            "iIsGaming": 0,
            "_classname": "LiveList.LiveListInfo"
        },
    '''
    url = 'https://www.huya.com/g/wzry'
    root_pattern = 'var ALL_LIST_DATA = \[([\s\S]*?)\]'

    def __fetch_content(self):
        data_bytes = request.urlopen(self.url).read()
        buff = BytesIO(data_bytes)
        f = gzip.GzipFile(fileobj=buff)
        return f.read().decode('utf-8')

    def __analysis(self, data):
        list_result = []
        root_htmls = re.findall(self.root_pattern, data)
        root_html = root_htmls[0]
        # 使用 ,"tImgRecInfo":{"sType":"","sValue":"","sTypeDesc":"","_classname":"LiveList.ImgRecInfo"},"iIsGaming":0,"_classname":"LiveList.LiveListInfo" 来切割字符串,这样切割出来的字符串仍然是一个JSON字符串
        words = root_html.split(',"tImgRecInfo":{"sType":"","sValue":"","sTypeDesc":"","_classname":"LiveList.ImgRecInfo"},"iIsGaming":0,"_classname":"LiveList.LiveListInfo"')

        for index, word in enumerate(words):
            if word[0:2] == "},":
                word = word[2:]
            list_result.append(word + "}")
        # 删除list最后一个元素
        list_result.pop()

        # 将list中的每个元素转换为json字符串
        json_result = []
        for word in list_result:
            json_string = json.loads(word)
            json_result.append(json_string)
        return json_result

    def go(self):
        data = self.__fetch_content()
        results = self.__analysis(data)
        return results

# 打印数据
spider = Spider()
results = spider.go()
for result in results:
    print(result)
感谢支持
更多内容,请移步《超级个体》。